


The 6 biggest mistakes landscape lighting DIYers make
People who are new to Landscape Lighting typically make 6 mistakes:
- Designing with fixtures instead of light
- Not having a realistic budget
- Using low-quality wire connections
- Installing undersized wire
- Placing fixtures in poor locations
- Not taking into account the possibility of light glare
Envision light, not fixtures
When designing landscape lighting, it is important to focus on the effect that the light will create, rather than the fixtures themselves.
Many people make the mistake of choosing fixtures based on their appearance, without considering the light output or beam spread of the fixture. This can lead to undesirable results.
The first step in designing effective landscape lighting is to visualize the desired effect.
- What do you want your landscape to look like at night?
- Do you want to highlight certain features, such as a tree or a water feature?
- Do you want to create a sense of security or ambiance?
Once you know what you want to achieve, you can start to choose fixtures that will produce the desired effect.
Here are some additional tips for designing landscape lighting with light in mind:
- Use a variety of fixtures to create different effects.
- Use different bulb types to create different moods.
- Consider the time of year when designing your landscape lighting.
- Experiment with different placement options.
By visualizing the desired effect and choosing fixtures that will produce the desired effect, you can create beautiful and effective landscape lighting that will transform your outdoor space at night.
Unrealistic budget
When designing landscape lighting, it is important to focus on the effect that the light will create.
Cheaply-made fixtures may be able to achieve the desired effect temporarily, but they will not stand up to the wear and tear of the outdoor environment.
The harsh weather conditions outside your home will quickly erode and break down cheaply made fixtures.
At Landscape Lighting Pro, we only use quality brass and copper fixtures. Brass and copper are materials that effectively stand up to the elements. They are also built to effectively protect and house the internal components of the fixture, such as sockets and LED lamps.
Wire Connections
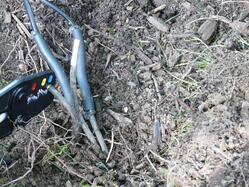
The weakest link
Wire connections are the number one failure point in most landscape lighting systems.
This is because they are the most susceptible to moisture damage.
Undersized Wire
Another common mistake is using undersized wire. Using a wire that is too small for the load can lead to Undervoltage, tripping, and failure. While it is tempting to use a smaller wire to save money, it is important to use the correct gauge for your system.
Fixture location
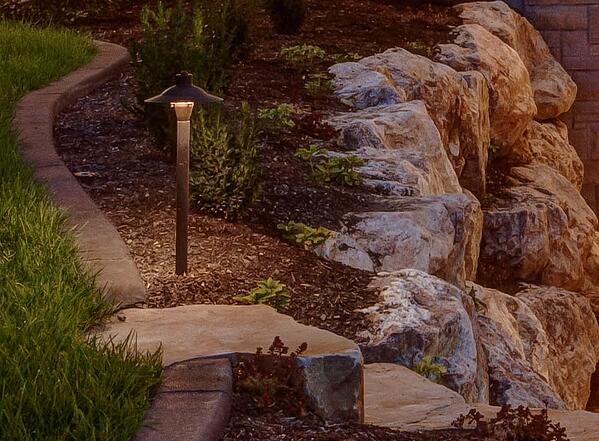
The wrong application can ruin your fixtures
Even the most durable fixture will fail if it is not installed in the right location.
If you don’t plan carefully, you could end up with damaged fixtures that don’t work as intended. This could leave you with an expensive repair bill, or even worse, you might have to replace the fixtures altogether.
Here are some tips for choosing the right location for your landscape lighting fixtures:
- Consider the type of fixture.
- Think about the effect you want to create.
- Consider the safety of the location.
Light glare
When you’re installing landscape lighting, it’s important to consider glare.
There are a few things you can do to prevent glare from your landscape lighting:
- Use fixtures with eyelid or shrouds. These features help to block the direct light from the fixture.
- Place fixtures so that the light is not directed directly at the viewer. Imagine an invisible line between the fixture and the viewer. The light should be shining along this line, not directly at the viewer.
- Use lower wattage bulbs. Lower wattage bulbs produce less light, which means less glare.
Why you shouldn’t DIY
Landscape lighting can be a beautiful and functional addition to your home, but it’s important to do it right. There are many reasons why you should never DIY your own landscape lighting, including:
- Safety
- Durability
- Aesthetics
If you’re thinking about installing landscape lighting, the best thing to do is to hire a professional.
Call us
If you’re curious about the cost of installing an outdoor landscape lighting system and you’re located in Utah, give us a call at (801) 440-7647. We offer free consultations and would love to help you start your backyard lights transformation.